5. Create the Run
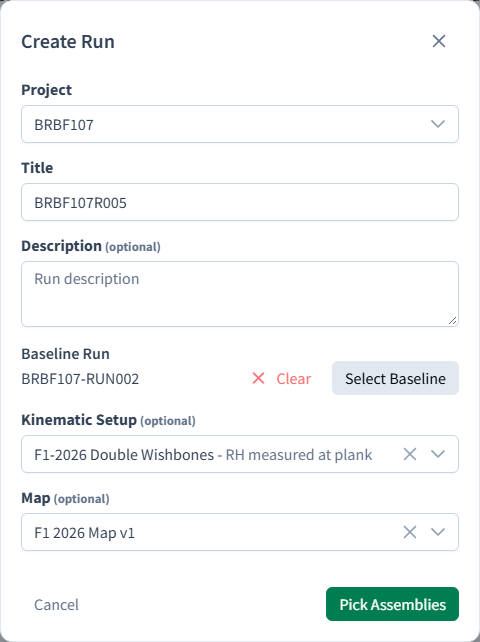
A Run brings everything together. It combines the geometry (Assemblies) with the conditions (Map and Kinematic Setup). Each Attitude in the Run then gets a solver setup.
Create the Run
- Check that the header shows DEMO and DEMO01. A Run is created in the selected Project.
- In the sidebar, under Simulation Admin, click Runs.
- Click New Run.
- In Create Run, enter:
- Title:
First front wing run - Description:
Tutorial: isolated front wing, 50 m/s RANS - Baseline Run: leave empty. This is your first Run, so there's nothing to compare it with yet.
- Kinematic Setup:
Front wing - Map:
Front wing 50 m/s
- Title:
- Click Pick Assemblies.
- In Select Assemblies, move the Front wing Assembly from Available Assemblies to Selected Assemblies.
- Click Create Run.
Don't forget the Assembly
You can create a Run with no Assemblies, but you can't launch it. If you skip step 6, open the Run and add the Assembly before launching.
Set up the Attitude's CFD
Each Attitude needs a methodology (the solver and its version), a workflow (the kind of solve) and a Template Case.
- In the Runs table, click First front wing run to open it.
- Open the CFD Setup tab.
- Click the pencil icon at the top of the v50 Attitude's column.
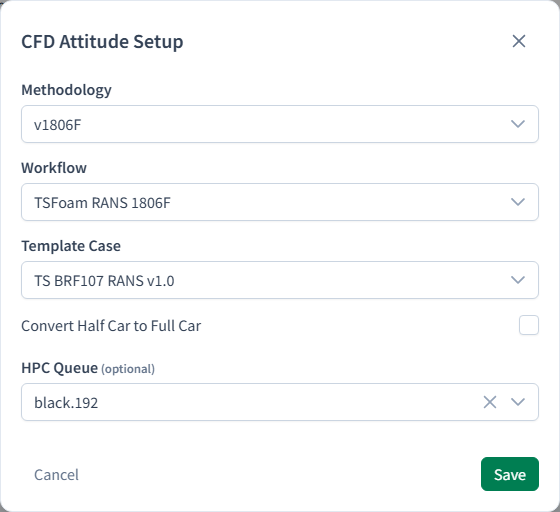
- In CFD Attitude Setup, choose:
- Methodology:
v1806F - Workflow:
TSFoam RANS 1806F - Template Case:
Isolated front wing
- Methodology:
- Leave the other options at their defaults and click Save.
Many Attitudes?
When a Run has several Attitudes, the Save button has a menu with Save to All. It applies the same setup to every Attitude in one go.
Checkpoint
The CFD Setup tab shows v1806F, TSFoam RANS 1806F and Isolated front wing for the v50 Attitude.
The Run Checks and PostPro Setup tabs let you choose which pre-checks run and which images are generated. The defaults are fine for this tutorial.