Create a Map
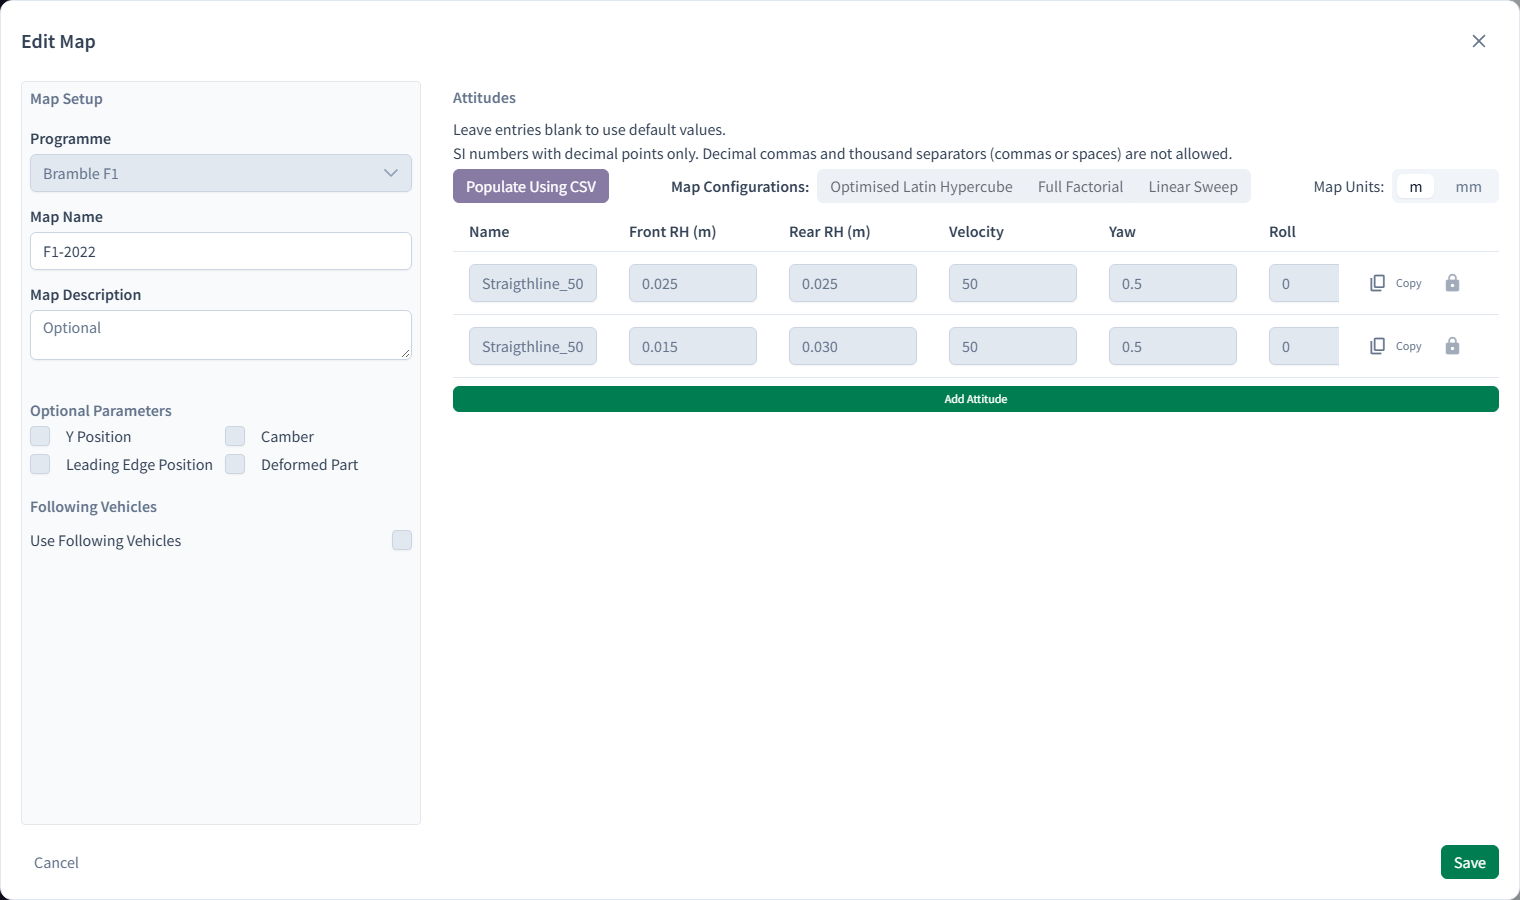
A Map lists the conditions to simulate. Each row becomes an Attitude when the Map is used in a Run.
Create the Map
- In the sidebar, under Setup & CAD, click Maps.
- Click New Map.
- In Create Map, under Map Setup, choose the Programme and enter a Map Name (up to 100 characters, unique within the Programme), plus an optional Map Description.
- Under Optional Parameters, tick any extra parameters you want to set, such as Corner Radius. Each one adds a column to the Attitudes table. The section only appears if your Account has optional parameters.
- Set Map Units to
mormm. This sets the unit for the ride-height columns (and Corner Radius), and the column headers show it. -
Click Add Attitude for each condition, and fill in the row:
- Name: letters, digits, spaces,
-and_. Names must be unique within the Map. - Parameters: by default Front RH, Rear RH, Velocity, Yaw, Roll and Steer. Your Account may have a different set. Leave a cell blank to use the default value from the Kinematic Setup.
Use numbers with a decimal point only, such as
0.5. Decimal commas, thousand separators and exponents like1e-3aren't accepted. To start a new row from an existing one, click Copy in that row, then give the copy a name. - Name: letters, digits, spaces,
-
Click Save. It stays disabled until the Map has at least one Attitude ("Can not save map with no attitudes") and every cell is valid.
For every column, its unit and its limits, see Map parameters.
Do I need a Map?
Not for a single condition. A Run with no Map gets one Attitude, and its velocity comes from the Template Case.
Generate or import Attitudes
You don't have to type every row. From the Attitudes panel you can:
- Generate a sweep across parameter ranges with Full Factorial, Optimised Latin Hypercube or Linear Sweep. See generate a sweep.
- Load Attitudes from a
.csvfile with Populate Using CSV. See import a Map from CSV.
Both replace every row already in the table, so do them first, then add or edit individual rows.
Manage Maps
The Maps page lists the Maps in the current Programme. Use the search box to filter by name or description, and click the pencil icon to open Edit Map.
Maps used in a Run
Bramble locks each Attitude row separately, when an Attitude made from it is launched. The row unlocks again when every Attitude that uses it has been reset or deleted.
While any row is locked:
- Locked rows are read-only and show a lock icon instead of the delete button.
- Programme, the Optional Parameters checkboxes, Populate Using CSV and the Map Configurations buttons are disabled ("This map is locked"). Following-vehicle settings are read-only.
- The Map can't be deleted. Its delete button shows a lock ("Map is locked").
You can still:
- Add Attitude, and edit or delete rows that aren't locked.
- Copy a locked row. The copy is unlocked and starts with a blank name.
- Change the Map Name and Map Description, and Save.
So you can extend a Map that's already been used, for example to add more points to an aero map.
Copy a Map
Click Create Copy in the Map's row. Copy Map opens with every Attitude copied and unlocked, and the Programme set to the current Programme. The description starts blank. Change the Map Name (names must be unique within a Programme), then click Save.
Delete a Map
- Click the delete button in the Map's row. If it shows a lock instead, the Map has locked rows and can't be deleted.
- In Delete Map, click Delete.
Optimisation Maps
Maps created by the optimisation workflow are hidden from the list. If any exist, a Show Optimisation Maps: toggle appears on the Maps page. Turn it on to list them. Bramble remembers the setting in your browser. See create an optimisation run.
Related: Map parameters · Create a Kinematic Setup · Create a Run · Locking · Simulation configuration