Upload Parts
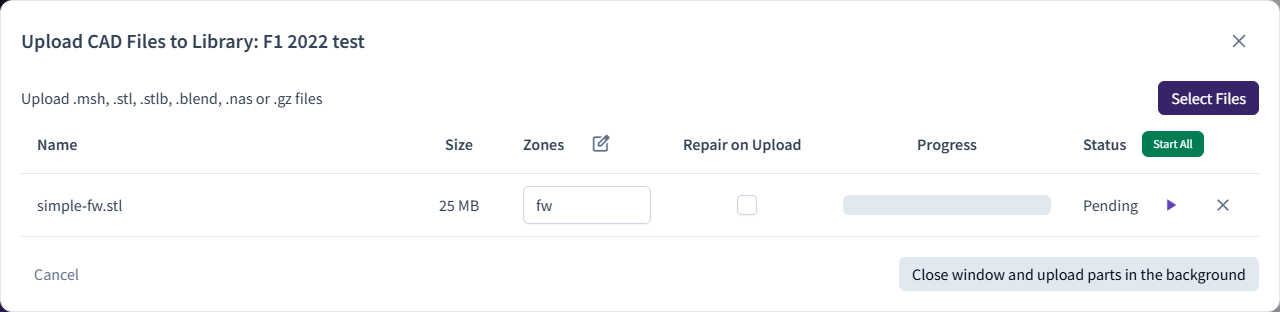
Each geometry file you upload becomes a Part in a Part Library. You can upload several files at once.
Before you start
Supported files are .stl, .stlb, .nas, .msh and .blend, and gzipped versions of these. See
file formats and limits.
Create a Part Library (if you need one)
- In the sidebar, under Setup & CAD, click Parts.
- Click New Folder.
- In Create Part Library, choose the Programme and enter a Name.
- Click Create Part Library.
Upload files
- On the Parts page, in the library's row, click Upload Parts.
- Click Select Files and choose one or more files.
- For each file, fill in the row:
- Zones: required for
.stland.stlbfiles, and shown as N/A for formats that store their own zone names. The zone must start with one of your Account's zone patterns and contain no spaces. See zone naming. - Part number: appears only if your Account extracts part numbers from file names.
- Repair on Upload: tick this to have Bramble attempt to repair the surface.
- Zones: required for
- Click Start All, or Start on individual rows.
Each row's Status moves from Pending to Started to Complete. If an upload fails, click Retry. To keep working while files upload, click Close window and upload parts in the background. The cloud icon in the header shows progress.
After upload, Bramble processes each Part. Some Part actions, such as creating an Assembly from it, stay disabled until processing finishes.
Enter a valid zone
If a row's Start button stays disabled with this message, the zone doesn't match your Account's zone patterns. Click the edit button next to the Zones heading to see the valid patterns. There you can add one, or use Restore Default Zone Patterns, then click Confirm. The list applies to the whole Account.
Related: Create an Assembly · Geometry